
This is a follow-up to my original post about autogenerating a dashboard view of the Modules page in Canvas.
IT IS STILL VERY MUCH A WORK IN PROGRESS SO SEE CAVEATS AT THE BOTTOM AND PLEASE DO CONTRIBUTE YOUR OWN IMPROVEMENTS – there are some TODOs in the .js file on GitHub
Canvas dashboard-like tiles generated for each Module in Modules:
- Optional images are shown on each tile if there is one or more images in a folder called ’tiles’ (configurable) in Files.
- Clicking on the body of the tile takes you to the appropriate part of the Modules page
- Optionally, a drop-down menu (click the black arrow) will list the items in a Module. Clicking the item will take you to that item
There are now two possible use scenarios:
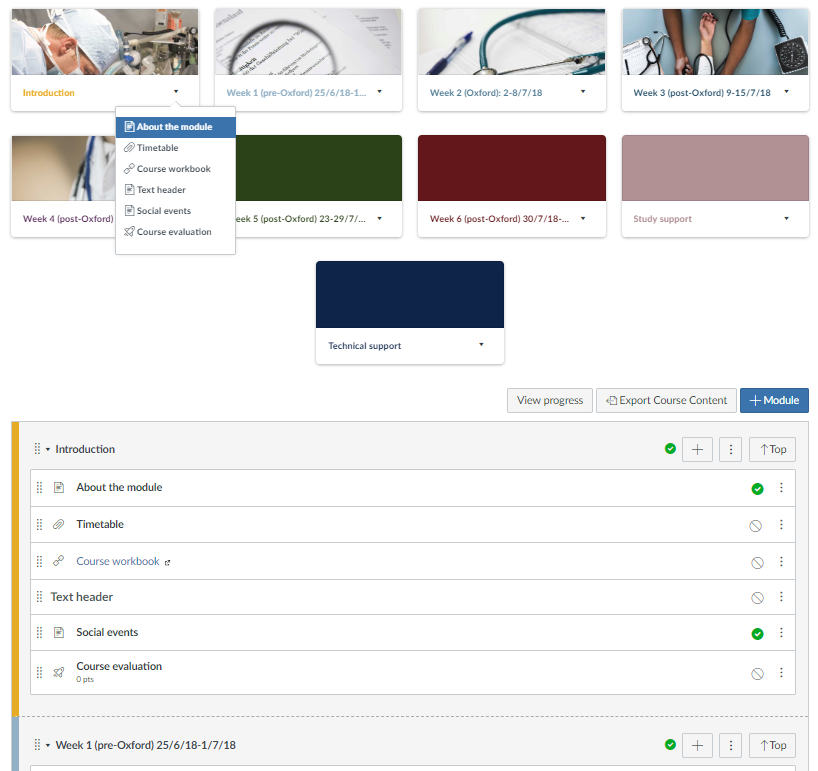
Option 1: Modules page as Home:
- Tiles with drop-downs inserted at top of Modules page
- Top buttons inserted in each Module to take you back up to the tiles
- LH border of each module coloured to match tile colour
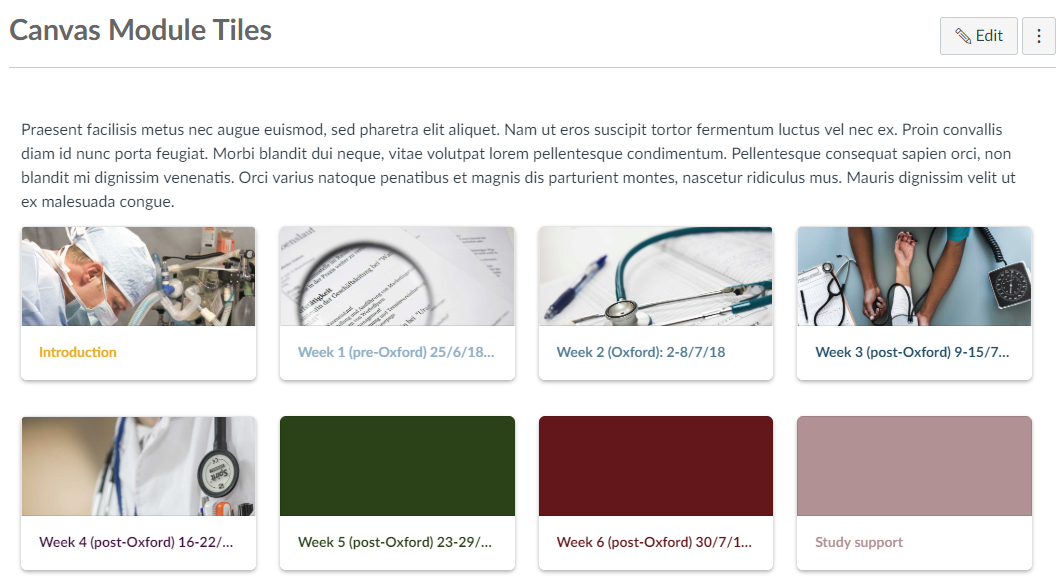
Option 2: Pages Page as Home:
- Tiles replace a table in a Page which is set as Home
- Whether or not the drop-down menu for items is shown is configurable, based on table id

How to use
- You will need to get the .js and .css from: https://github.com/msdlt/canvas-module-tiles (‘Clone or download’ button then ‘Download ZIP’)
- In the sub-account where you want the tiles to show (it may be worth creating a sub-account specifically for one course), go to ‘Themes’, add a new theme then roll over your new theme to click the ‘Open in theme editor’ button.
- Click the ‘Upload’ tab (top left) then select the .css and .js files in the ‘CSS file’ and ‘JavaScript file’ upload boxes FOR THE ‘Canvas desktop application’ ONLY – this code will not currently work in the student app – more on that later.
- Click ‘Preview your changes’ then have a look through to check everything is working OK on your site before clicking ‘Save theme’ then ‘Apply theme’.
- If you now set the Modules page as your Home, you should see the tiles appearing in the web.
- In the student app, students will see the Modules page as normal.
Using tiles on a Home Page (created in Pages)
- Create your Page
- Insert a table and then use the HTML Editor to set its id attribute to be either homePageTable or homePageTableTilesOnly as shown here:
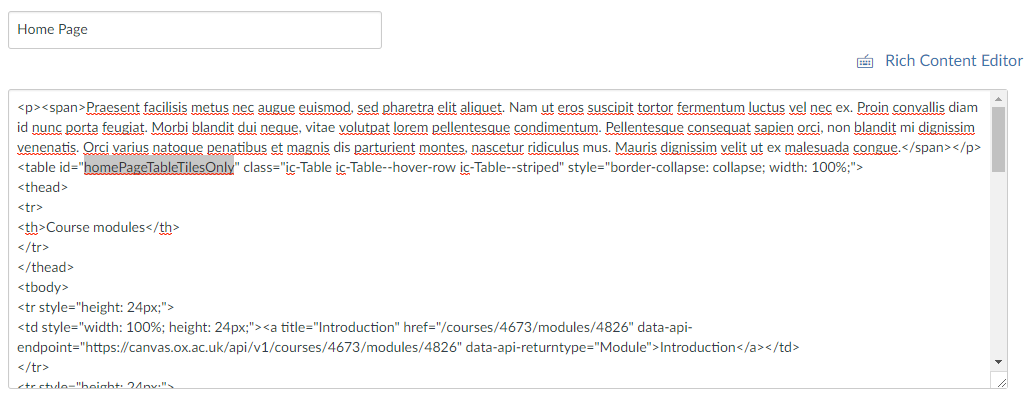
- On the web, this table will be replaced with:
- if id=”homePageTable” – tiles with drop-down item menus
- if id=”homePageTableTilesOnly” – just tiles for each module (useful if you have a lot of items in each Module).
- In the student app, the table you inserted in 2 will not be replaced with tiles as this is not yet possible. To give student app users an equivalent experience, I suggest that you populate your table with links to each of your modules as shown below:

This is very easy to do in the standard Page editor by typing the name of your Module into the table, then selecting that name and clicking on the name of your Module in Links | Modules in the right hand panel: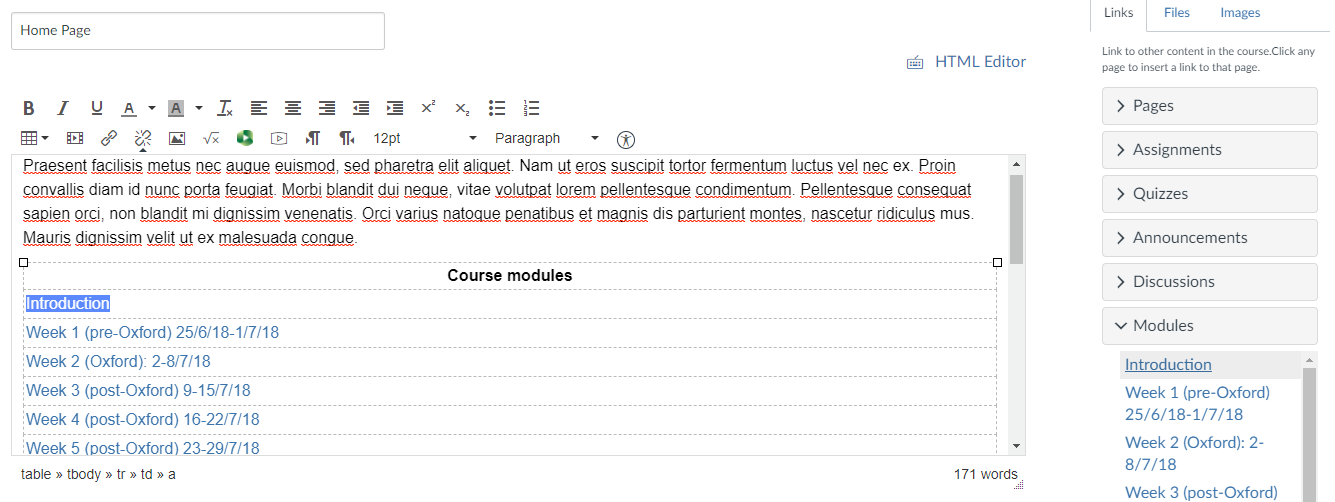
Adding images to your tiles
- Create a folder in Files called ’tiles’ (note that you can change which folder the script looks in for images by changing the string assigned to ’tileImagesFolderName’ in the .js file.
- Upload images the images you wish to appear on the tiles:
- tile images are centred so make sure the images you choose have plenty going on in the middle as the portion of the image shown will change according to screen size.
- keep the images fairly small so as not to slow down page load too much
- images are shown on tiles in alphabetical order by their name
Caveats
- If you are using an images (e.g ’tiles’) folder to show images on each tile, students will have to be given access to the Files tool on their LH menu. If you do not want them to have access to this there is currently no way to show images – sorry!
- Student app:
- This won’t currently work on the student app as we still have no way of getting the Course ID from within the app and so there’s no way of knowing which ID to pass the api.
- Even if we had the Course ID (we could hard code it into the .js file and have a sub-account/js for every Course), we will not be able to write this dashboard into the Modules page in the app as it appears to be native code (rather than a web page). However, it might work in a Home Page – not tested yet!
- Even though this method now relies mostly on the structure of the Canvas apis, which should be fairly stable, it does still rely on current the structure of Canvas’s pages to some extent – much more so in the Modules page option than in the Home Page option – I fully expect this to break at some point as Canvas changes it’s structure so be warned….
- I haven’t yet added icons in the drop-down list for all the Canvas item-types – do please share your updates
- I haven’t yet sorted out the column styles for cases where noOfColumnsPerRow is not 4 – again, please do share any updates
- Note that the tile generation is ONLY fired if the Modules page or your Page containing the table with the special id is your Course’s Home and tiles will not be shown when navigating to the Modules page or your Page directly.
As always, I’d love any suggestions for improvements or to hear about how you have adapted it for your needs.